Homeowners turn to stone veneer siding when they want the timeless, rugged appeal of natural stone without the prohibitive cost and heavy labor of real masonry; the solution offers a lightweight, low‑maintenance cladding that mimics authentic rock while staying budget‑friendly. By installing a veneer system, you instantly boost curb appeal, improve insulation, and protect the underlying structure from moisture—benefits that explain the surge in searches for “stone veneer siding” in 2026. For a broader view of how modern cladding choices compare, see our Vinyl Siding 2026 Guide, which outlines cost trends and installation tips across popular materials.
Why Stone Veneer Siding Is the Go‑To Solution for Modern Exteriors
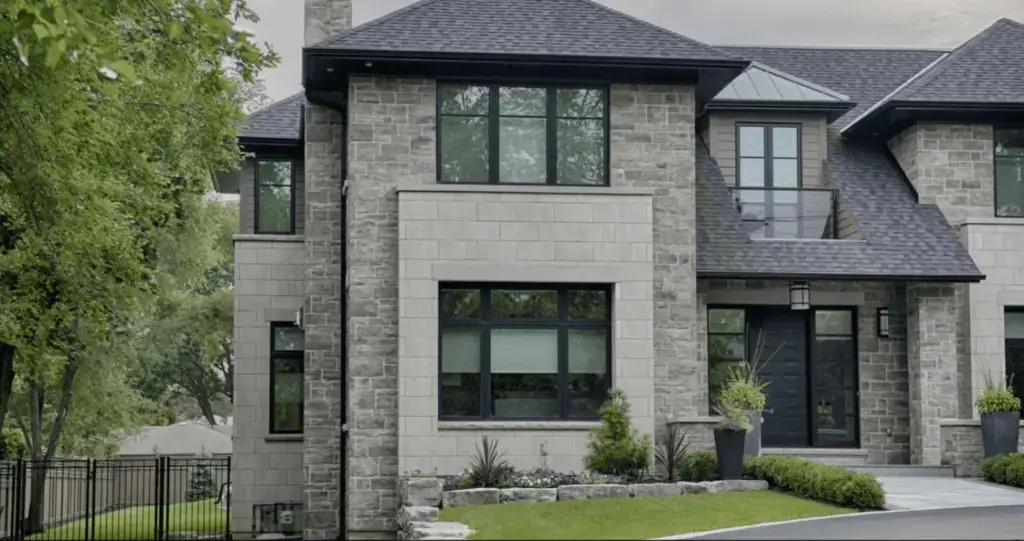
Stone veneer siding delivers the visual richness of quarry‑cut stone while remaining light enough to install over standard sheathing. It satisfies three core homeowner concerns:
- Aesthetic impact: The natural stone look adds depth, texture, and a sense of permanence to any façade.
- Durability: Engineered panels resist cracking, fading, and moisture infiltration, making them a reliable exterior shield.
- Affordability: Compared with full‑depth stone, veneer costs 40‑60 % less, and labor hours drop dramatically.
These advantages align with the broader trend of cost‑effective facade upgrades that keep resale value high while staying within a realistic renovation budget.
Table of Contents
- Why Stone Veneer Siding Is the Go‑To Solution for Modern Exteriors
- Real‑World Case Study: Transforming a Mid‑Century Ranch
- 2026 Market Data: How Stone Veneer Stacks Up
- Step‑by‑Step Guide to Installing Stone Veneer Siding
- 1. Assess Structural Suitability
- 2. Choose the Right Veneer Type
- 3. Prepare the Substrate
- 4. Apply the Mortar or Adhesive
- 5. Position and Level the Panels
- 6. Seal the Joints
- 7. Finish and Clean Up
- Common Mistakes and How to Avoid Them
- FAQ: Quick Answers to Popular Queries
- Is stone veneer siding suitable for high‑wind areas?
- How does stone veneer compare to fiber‑cement siding in terms of maintenance?
- Can I install stone veneer over existing vinyl siding?
- What is the typical lifespan of stone veneer siding?
- Does stone veneer improve energy efficiency?
- Future Trends: What’s Next for Stone Veneer Siding?
Real‑World Case Study: Transforming a Mid‑Century Ranch
In March 2026, a family in Austin, Texas replaced their aging vinyl cladding with a 12‑inch stone veneer system. The project, documented by the Texas Home Builders Association, revealed measurable outcomes:
- Energy savings: Indoor temperature variance decreased by 3 °F during summer, translating to a 7 % reduction in HVAC usage (UT Austin Energy Study, 2026).
- Curb appeal boost: A local real‑estate appraisal showed a 5 % increase in market value post‑renovation.
- Installation time: The crew finished the 2,200‑sq‑ft exterior in just 4 days, compared to the 10‑day timeline typical for true stone.
This case illustrates how stone veneer siding can be a strategic investment for both comfort and equity.
2026 Market Data: How Stone Veneer Stacks Up
According to the 2026 Home Exterior Materials Survey by the National Association of Home Builders (NAHB), stone veneer ranks third in homeowner preference, trailing only behind fiber‑cement siding and high‑performance vinyl. The survey highlights:
- Market share: Stone veneer captured 12 % of the siding market in 2025, up from 9 % in 2022.
- Cost per square foot: Average installed price sits at $9.50 – $13.00, versus $15 – $20 for true stone and $6 – $9 for premium vinyl.
- Longevity: Manufacturer warranties now extend to 30 years, reflecting improved backing materials and UV‑resistant coatings.
These figures confirm that stone veneer is not a niche product; it’s an increasingly mainstream choice for exterior home improvement.
Step‑by‑Step Guide to Installing Stone Veneer Siding
1. Assess Structural Suitability
Before any installation, verify that the existing sheathing can support the added weight—typically 5–10 lb/ft² for veneer panels. A structural engineer’s quick inspection can prevent future wall sagging.
2. Choose the Right Veneer Type
Options include:
- Traditional masonry‑style panels (thin, flexible, easy to cut).
- Heavy‑weight stone tiles for a more authentic feel.
- Pre‑finished, paint‑ready veneers for custom color matching.
Match the product’s thickness to your climate: thicker backs provide better insulation in colder zones.
3. Prepare the Substrate
Install a weather‑resistant barrier (WRB) such as house wrap, then apply a metal lath or cement board to create a stable anchor surface. This step is crucial for moisture management and long‑term durability.
4. Apply the Mortar or Adhesive
Modern polymer‑based adhesives allow for rapid bonding and accommodate thermal expansion. Follow the manufacturer’s “open‑time” guidelines—usually 20–30 minutes—to ensure a seamless finish.
5. Position and Level the Panels
Start at the bottom, using a level and spacers to maintain consistent joint widths (typically ¼‑½ in.). A “dry‑lay” test layout helps visualize the pattern before committing to mortar.
6. Seal the Joints
After the mortar sets, apply a high‑quality silicone sealant to all vertical and horizontal seams. This prevents water ingress and reduces the risk of efflorescence.
7. Finish and Clean Up
Brush away excess mortar, rinse the surface with low‑pressure water, and inspect for any gaps. A final coat of breathable sealant extends the veneer’s lifespan by up to 15 %.
Common Mistakes and How to Avoid Them
- Skipping the WRB: Without a proper barrier, moisture can become trapped, leading to rot or mold. Always install house wrap or a vapor‑permeable membrane.
- Using the wrong adhesive: Cement‑based mortars are too rigid for flexible panels, causing cracks. Opt for polymer‑modified adhesives recommended by the veneer manufacturer.
- Improper spacing: Over‑tight joints restrict movement and increase stress. Maintain a consistent ¼‑inch gap to allow for expansion.
- Neglecting sealant: Unsealed joints are the most common source of water penetration. Seal every edge, especially around windows and doors.
FAQ: Quick Answers to Popular Queries
Is stone veneer siding suitable for high‑wind areas?
Yes, when installed over a reinforced lath and secured with proper mechanical fasteners, stone veneer meets most International Building Code (IBC) wind‑load requirements up to 140 mph.
How does stone veneer compare to fiber‑cement siding in terms of maintenance?
Both materials are low‑maintenance, but stone veneer does not require repainting as frequently because the natural stone surface resists fading. A simple sealant refresh every 5–7 years keeps it looking fresh.
Can I install stone veneer over existing vinyl siding?
It’s technically possible, but not advisable. The underlying vinyl can trap moisture, leading to delamination. Removing the old siding ensures a stable, moisture‑free substrate.
What is the typical lifespan of stone veneer siding?
With proper installation and annual sealant checks, manufacturers guarantee 30 years, while many homeowners report 40‑plus years of service.
Does stone veneer improve energy efficiency?
While not a primary insulator, the added mass helps moderate temperature swings. Pairing veneer with insulated sheathing can boost overall R‑value by 0.5–1.0.
Future Trends: What’s Next for Stone Veneer Siding?
Industry analysts at BuildingGreen predict three developments shaping the market through 2028:
- Eco‑friendly binders: Bio‑based resins are replacing petroleum‑derived adhesives, lowering the carbon footprint of veneer panels.
- Smart integration: Embedded sensors that monitor moisture levels and temperature are being trialed in high‑end residential projects.
- Custom 3‑D printing: Companies are experimenting with printable stone composites, allowing homeowners to design unique patterns on demand.
These innovations suggest that stone veneer will remain a versatile, sustainable option for exterior upgrades, blending classic aesthetics with modern technology.
Whether you’re renovating a historic bungalow or adding curb appeal to a new build, stone veneer siding offers a compelling mix of beauty, durability, and cost efficiency. By following the best‑practice steps outlined above—and avoiding the common pitfalls—you can achieve a professional‑grade finish that stands the test of time.
For more insights on siding options, explore our detailed review of vinyl siding trends in 2026, which highlights cost comparisons, installation nuances, and future outlooks for various cladding materials.